With over 1,000 exhibitors gathering in Nuremberg, Germany on 26 Feb.~29 Feb., 2019 , Embedded World has become one of the biggest trade fair among the IoT Technologies.


With over 1,000 exhibitors gathering in Nuremberg, Germany on 26 Feb.~29 Feb., 2019 , Embedded World has become one of the biggest trade fair among the IoT Technologies.

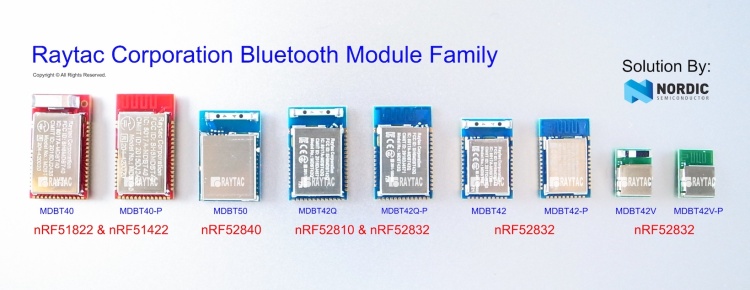
Raytac released nRF52840 USB Dongle which deployed MDBT50Q-P1M module offers a Bluetooth 5 specification granted, FCC/IC/Telec(MIC)/KC/SRRC/NCC/WPC pre-certified, and CE/RCM compliant solution.

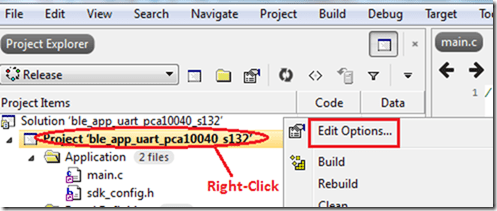
After setup been done, here comes the next question: How to program the firmware in to the module. We are using some simple instruction in below for reader’s quick reference.
Hardware
You will need a Nordic nRF5X DK or a Segger J-link as programmer to load the firmware. To use Nordic nRF5X DK to debug the SoC as well, you will need to order corresponding nRF5X DK to match the SoC number. For example, order nRF52840 DK to debug nRF52840 SoC or order nRF52 DK to debug nRF52832/52810 SoC. But if you are only using it as programmer, any version of nRF5X DK will work as we only use the J-link on this board.
Software
Please download Nordic nRFGo Studio for programming. Remember to install nRF5X Command Line Tools if the board was not detected by nRFGo Studio. Once they are all connected, you can then start programming. Please make sure to “erase all” every time before programming.
For more tutorials and demo of sample code, please visit Nordic’s DevZone and Infocenter where have ample resources to utilize.
Programing
SoftDevice + Application
SoftDevice + Bootloader+ Application
To easy customer’s IoT device mass production, Raytac provide code pre-program service into module before shipment. There are requirements listed in below for customers who need the service!


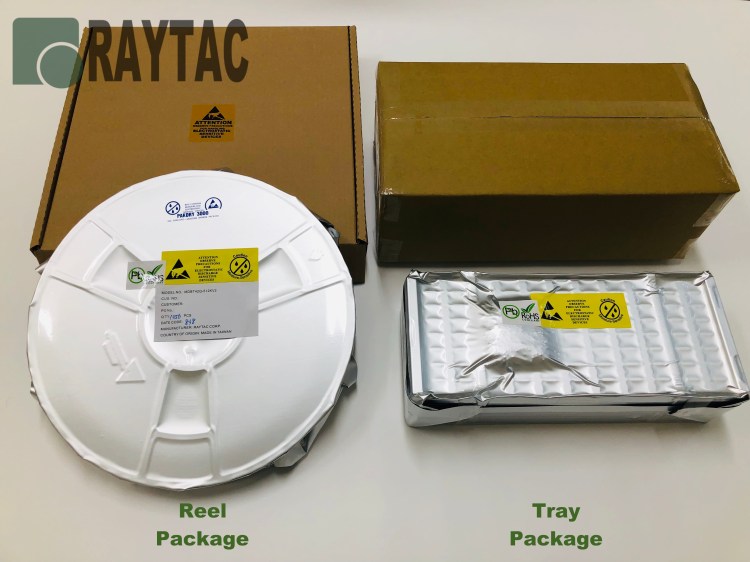
Raytac Corporation, a recommended 3rd-party module maker by Nordic Semiconductor, announced that MDBT42Q series module now provide a Reel Package option for customers’ selection.

When you start developing your firmware for your Nordic nRF52832 solution-based Raytac BLE module, you will (like on most other projects) bump into some difficulties.
The other day, we had yet another case where a simple thing caused major difficulties for even some of the brightest people – a customer couldn’t get their GPIO direction bit to work.
Although not too difficult to solve, it’s a common error that most customers end up having on our modules and that is because Pin 0.09 & 0.10 are set to NFC per Nordic’s default settings. In order to be able to use these pins as normal GPIOs, you will have to change those settings.
The two pins I am talking about are the ones linked to the NFC-part to the far left in the circuit example below:

So, to convert these two pins to normal GPIOs, here’s what you need to do:
In SES, you’ll need to add CONFIG_NFCT_PINS_AS_GPIOS.

Check out the link below for a reference example on Nordic’s DevZone.
Reference link: Nordic DevZone – NFC pins into GPIOs