Intro:
This is a guidance provided for those who is going to transit (or replicate) their project from Raytac MDBT50Q-RX (USB-A Dongle) to MDBT50Q-CX(USB-C Dongle). In addition to the hardware spec change (Compact Size , LED, Button, Pin definition change) , the key firmware configuration should be made with changes to fit new USB-C Dongle MDBT50Q-CX.


Table of Contents:
1. Comparison chart: MDBT50Q-RX(USB-A) & MDBT50Q-CX(USB-C)
2. Firmware configuration
3. Create a merged hex file (2 in 1 or 4 in 1)
4. Firmware flashing process
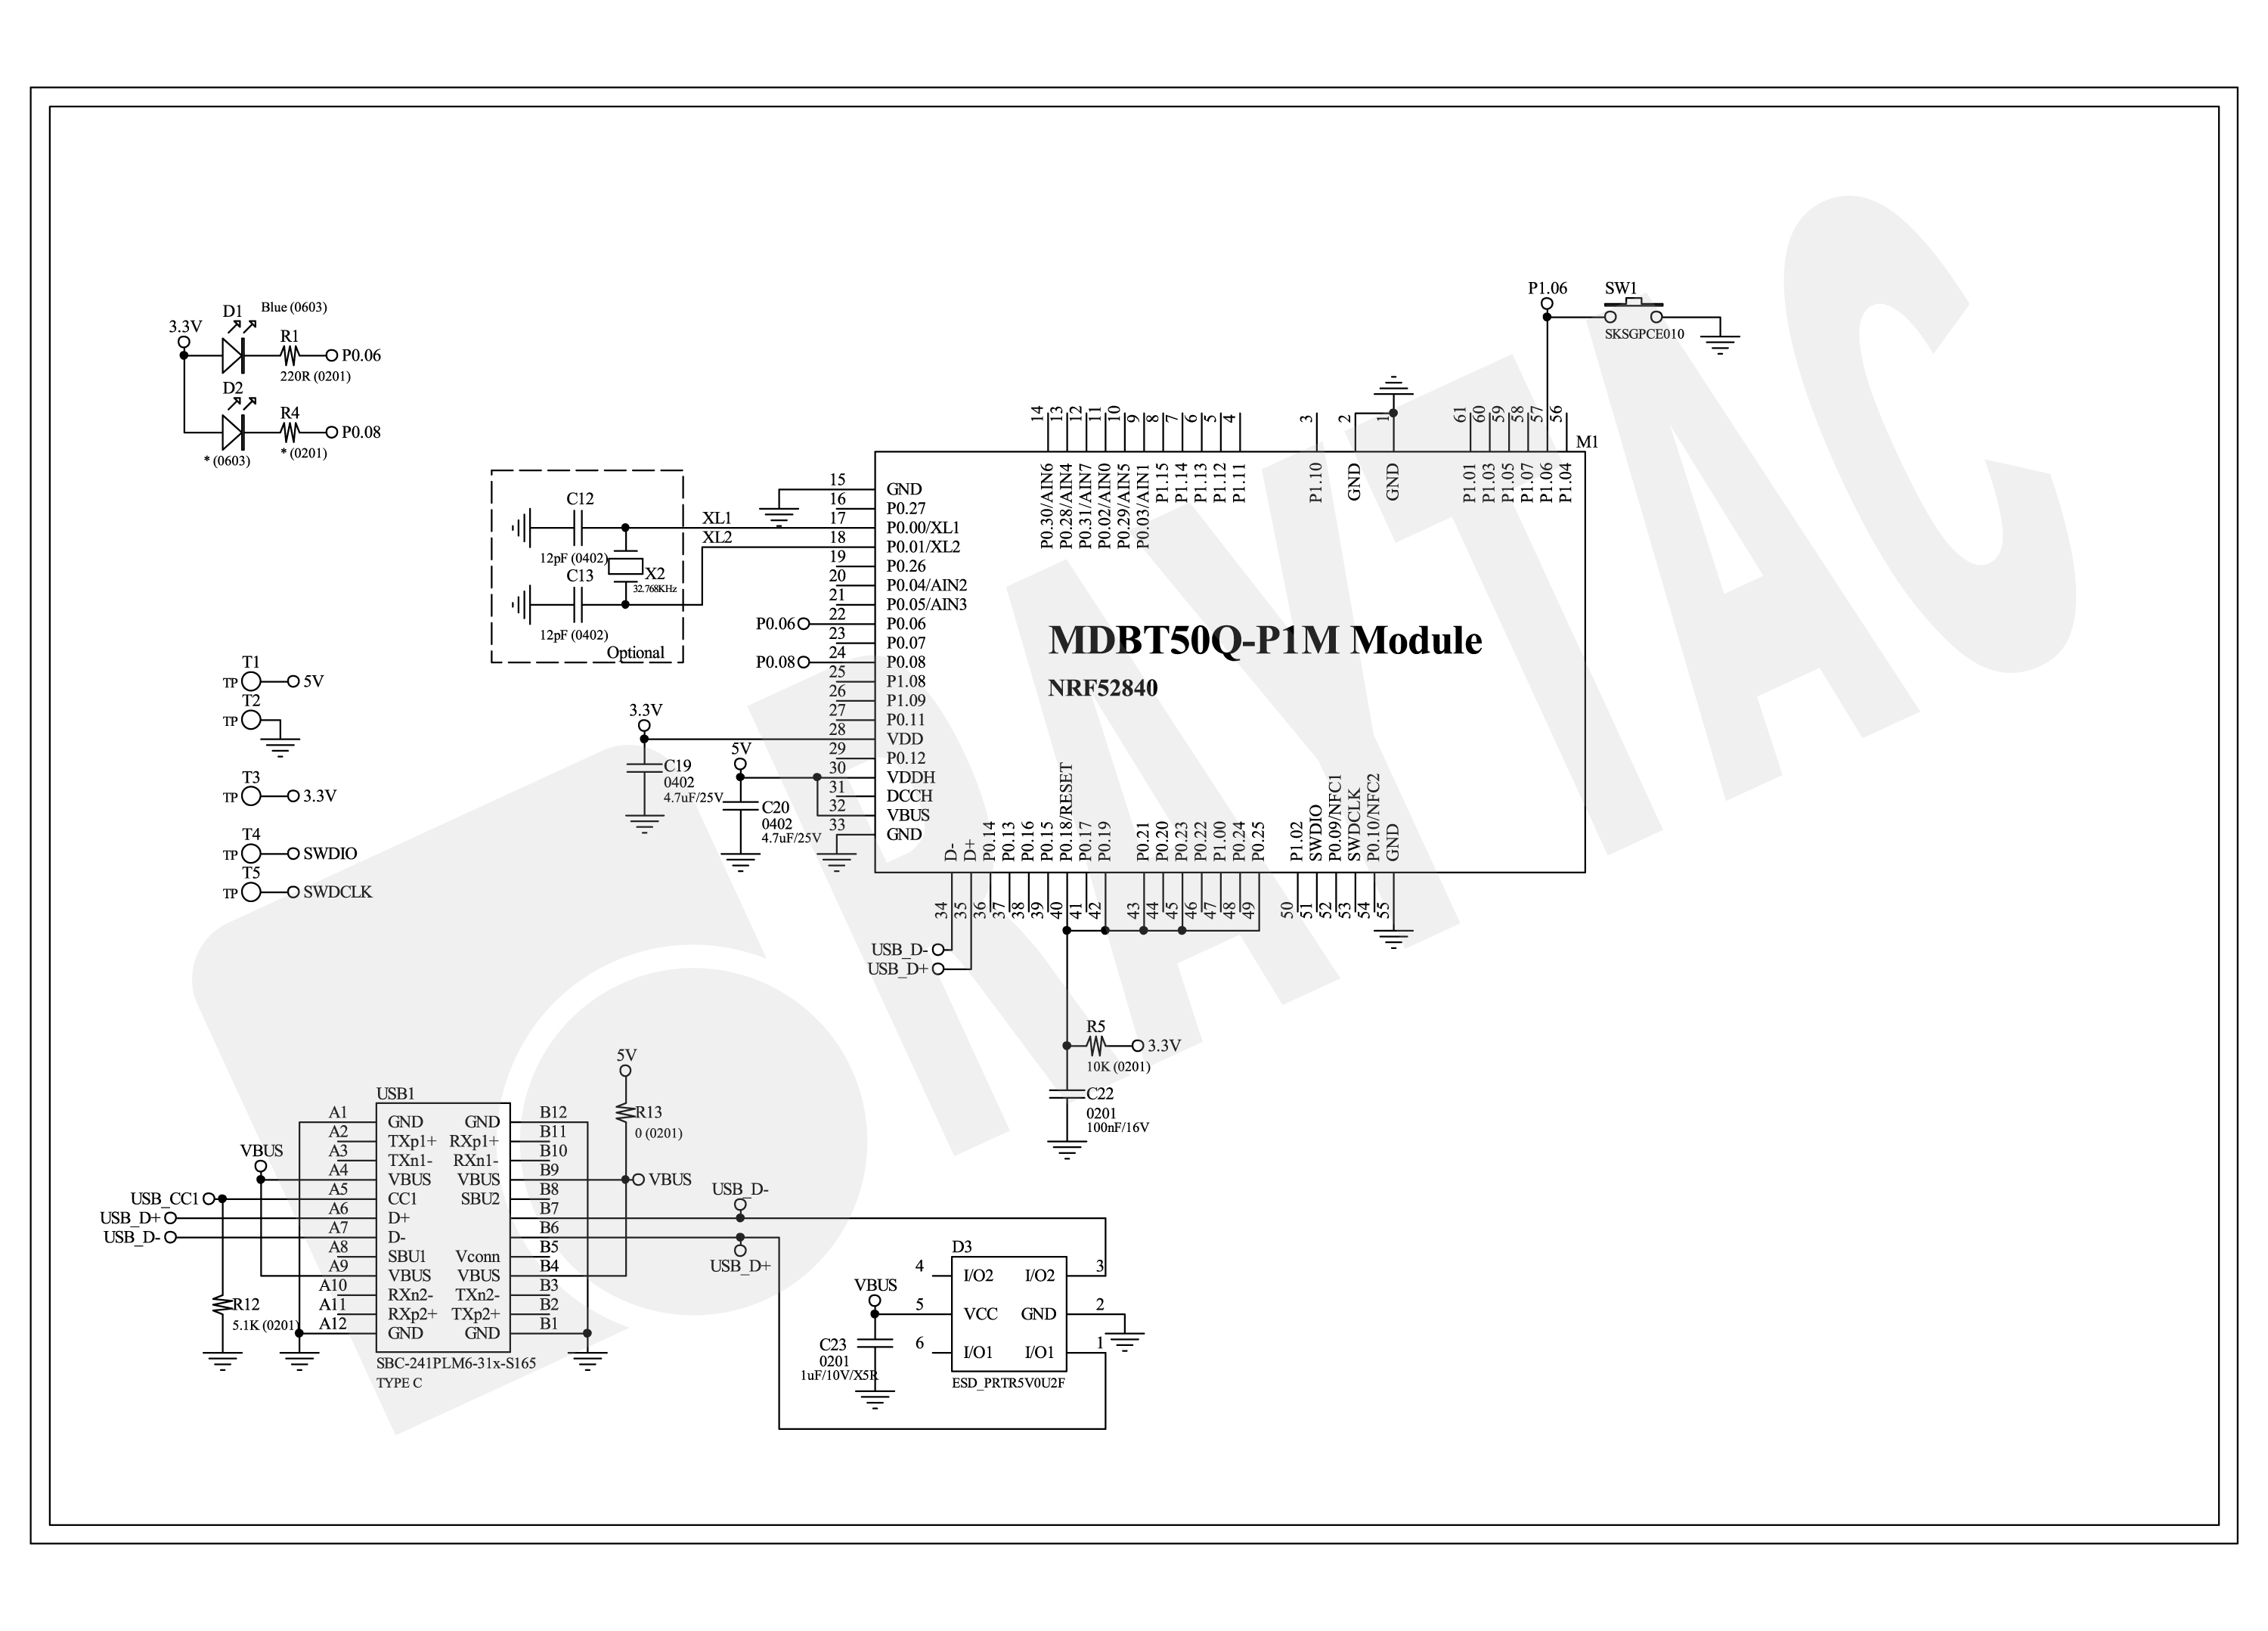
1. Comparison chart: MDBT50Q-RX & MDBT50Q-CX

2. Firmware configuration : MDBT50Q-RX → MDBT50Q-CX
Edit your current MDBT50Q-RX firmware with configuration change to align the PIN change to accommodate the hardware change.
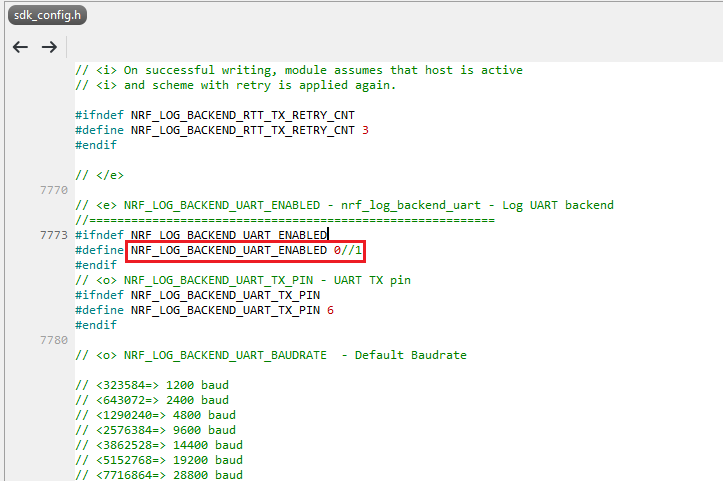
Option 1. Using nRF5 SDK:
Make the definition set up of LED, BUTTON pin in the highlighted 4 sections.

Option 2. Using NCS V2.6.X:
Use the board name: nrf52840dongle_nrf52840 and add the overlay file:
nrf52840dongle_nrf52840.overlay to the program (Devicetree Overlays),
then configure the below code definition into the overlay file:
/ {
leds {
compatible = “gpio-leds";
led0_green: led_0 {
gpios = <&gpio0 6 GPIO_ACTIVE_LOW>;
label = “Green LED 0″;
};
led1_red: led_1 {
gpios = <&gpio0 8 GPIO_ACTIVE_LOW>;
label = “Red LED 1″;
};
};
buttons {
compatible = “gpio-keys";
button0: button_0 {
gpios = <&gpio1 6(GPIO_PULL_UP | GPIO_ACTIVE_LOW)>;
label = “Push button switch 0″;
};
};
};

3. Create a merged hex file (2-in-1 or 4-in-1 hex file)
3A. Bootloader public key product
nrfutil keys generate public_key.pem → for zipping new firmware
nrfutil keys display –key pk –format code public_key.pem –out_file public_key.c
→ include public key to compile bootloader hex file


3B. Examples Demo
nRF5 SDK: nRF5_SDK_17.1.0_ddde560\examples\ble_peripheral\ble_app_uart\pca10056\s140
NCS V2.6.X: ncs\v2.6.0\nrf\samples\bluetooth\peripheral_uart
3C. How to generate bootloader setting file (if you need bootloader):
nrfutil.exe settings generate –family NRF52840 –application nrf52840_xxaa.hex –application-version 255 –bootloader-version 2 –bl-settings-version 1 bootloader_settings.hex
3D. Merge and create a 2-in-1 or 4-in-1 hex file
a). Merge 2-in-1 (no Bootloader file required):
mergehex.exe -m s140_nrf52_7.2.0_softdevice.hex nrf52840_xxaa.hex -o merge.hex

b). Merge 4-in-1 (with Bootloader file & Bootloader settings file required):
mergehex.exe -m bootloader.hex bootloader_settings.hex s140_nrf52_7.2.0_softdevice.hex nrf52840_xxaa.hex -o merge.hex

4. Firmware flashing process
MDBT50Q-RX(USB-A):Manual wiring is required to have the firmware uploaded.
Please refer to the article: Firmware Coding & DFU onto MDBT50Q-RX
MDBT50Q-CX(USB-C):Built-in open bootloader included for simple DFU process..
Please refer to the article: User Manual of MDBT50Q-CX (nRF52840/nRF52833-based USB-C Dongle)
Edited by Sales Manager: Ms. Jocelyn Tsai
Technical guidance provided by Firmware Deputy Manager: Mr. Stanley Huang
Raytac Corporation 勁達國際電子股份有限公司
Bluetooth & WiFi & LoRa module maker based on Nordic nRF54, nRF53, nRF52, nRF7002 solution
BT5.4 &BT5.3 & BT5.2 & BT5.1 Qualified, FCC/IC/CE/Telec/KC/RCM/SRRC/NCC/WPC Pre-Certified.
Bluetooth Solution: nRF54, nRF5340, nRF52840, nRF52833, nRF52832, nRF52820, nRF52811, nRF52810, nRF52805, nRF51822
WiFi Solution: nRF7002
http://www.raytac.com
email: sales@raytac.com
Tel: +886-2-3234-0208