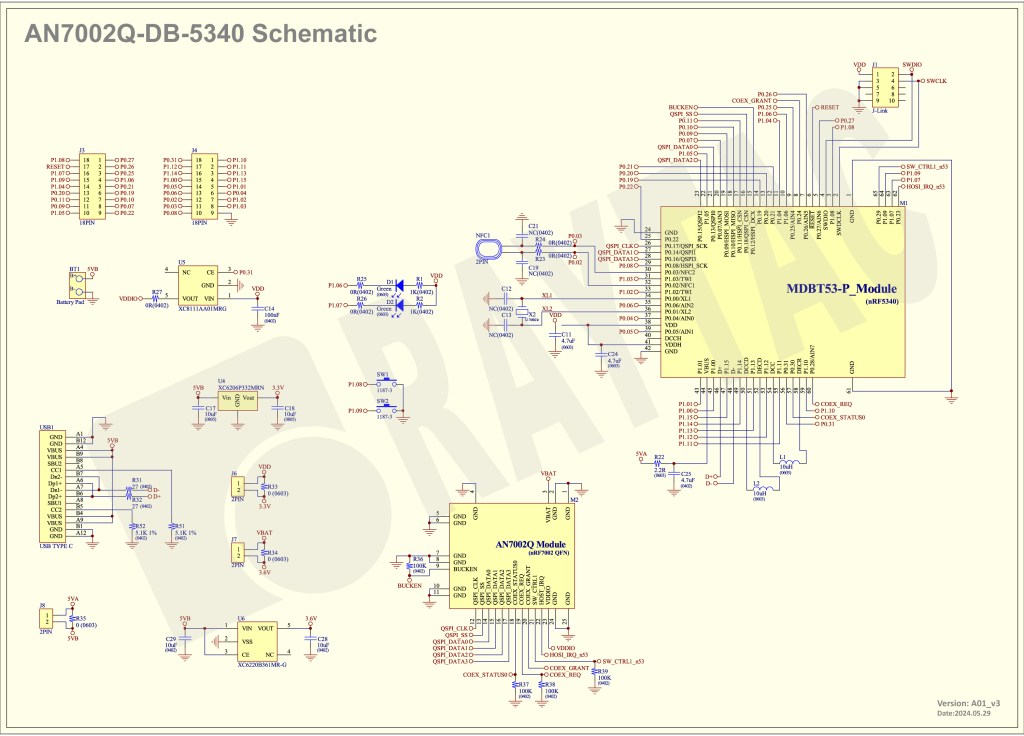
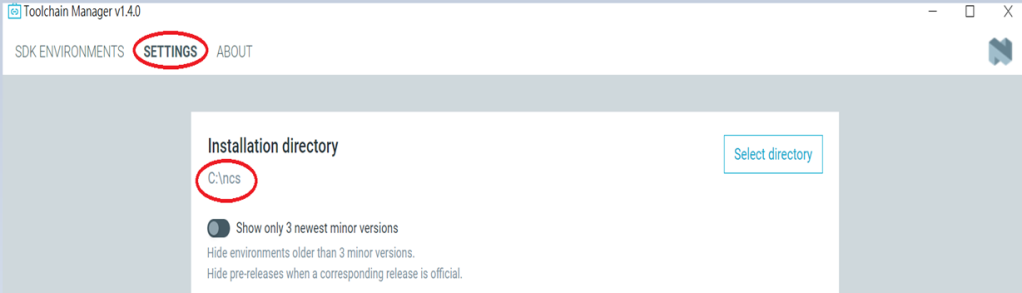
Recently we have received the FAQ: how to write MAC address into the OTP memory of Raytac’s AN7002Q-P Nordic Wi-Fi module? In this article, we’ll get this question explained to give customers a more smooth experience using the AN7002Q-nRF5340 Demo Board(AN7002Q-DB-5340).
Is there an existing Wi-Fi MAC address in the AN7002Q part on the DevKit?
Currently, the AN7002Q module on Raytac’s AN7002Q-DB-5340 board has no Wi-Fi MAC address.
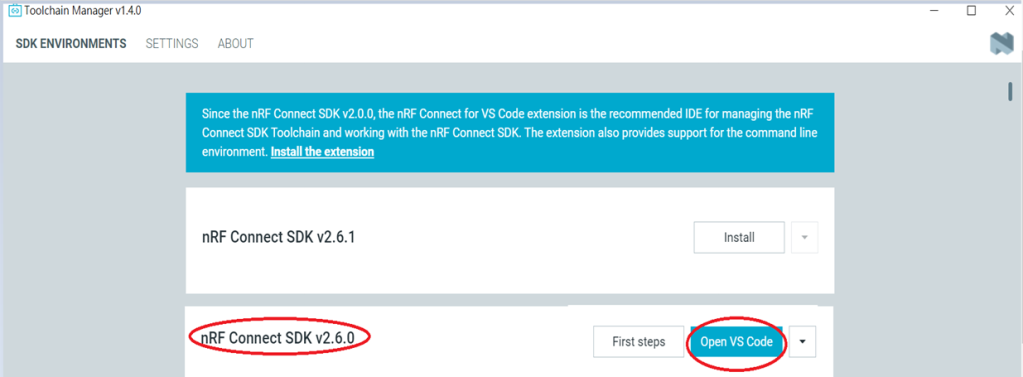
When running Wi-Fi Scan code/Station code/Shell code…etc. on NCS v2.6.0 (and later versions), the AN7002Q module must have a programed Wi-Fi MAC address to function properly.
Therefore, it’s necessary to follow the below process:
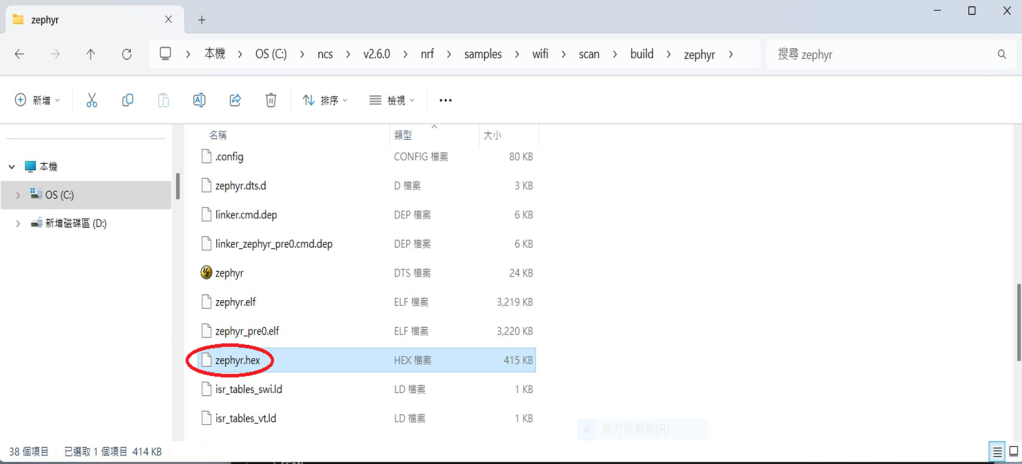
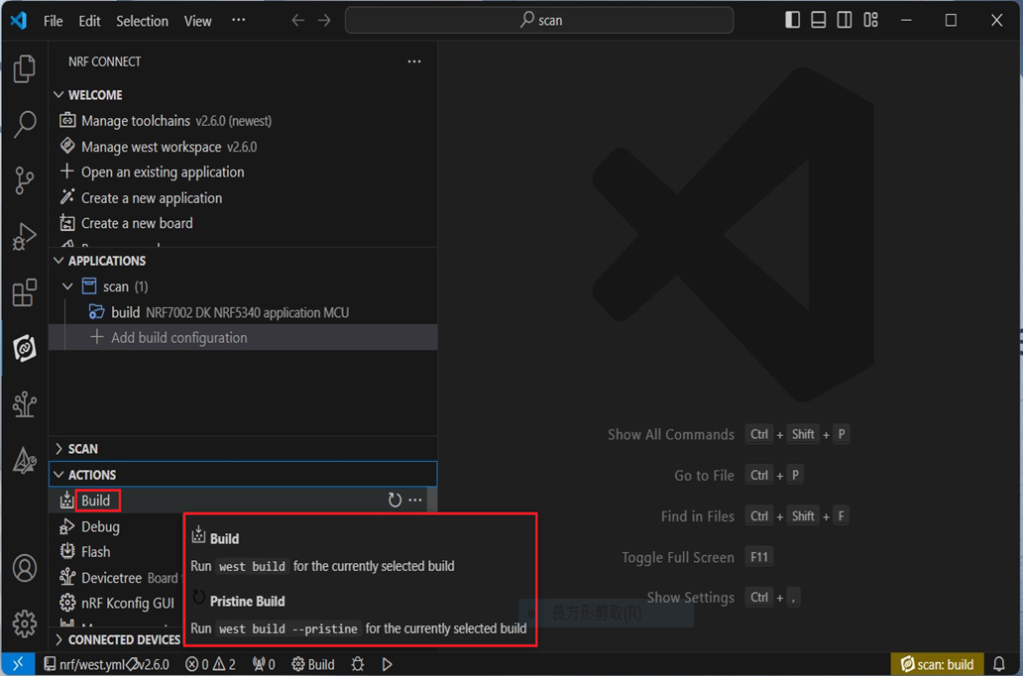
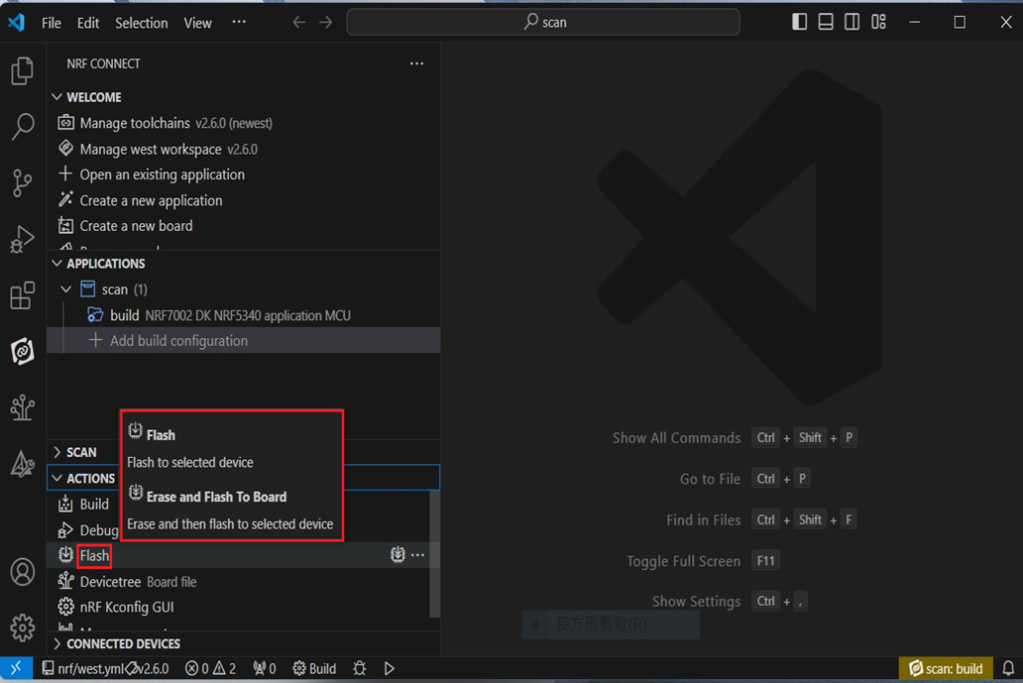
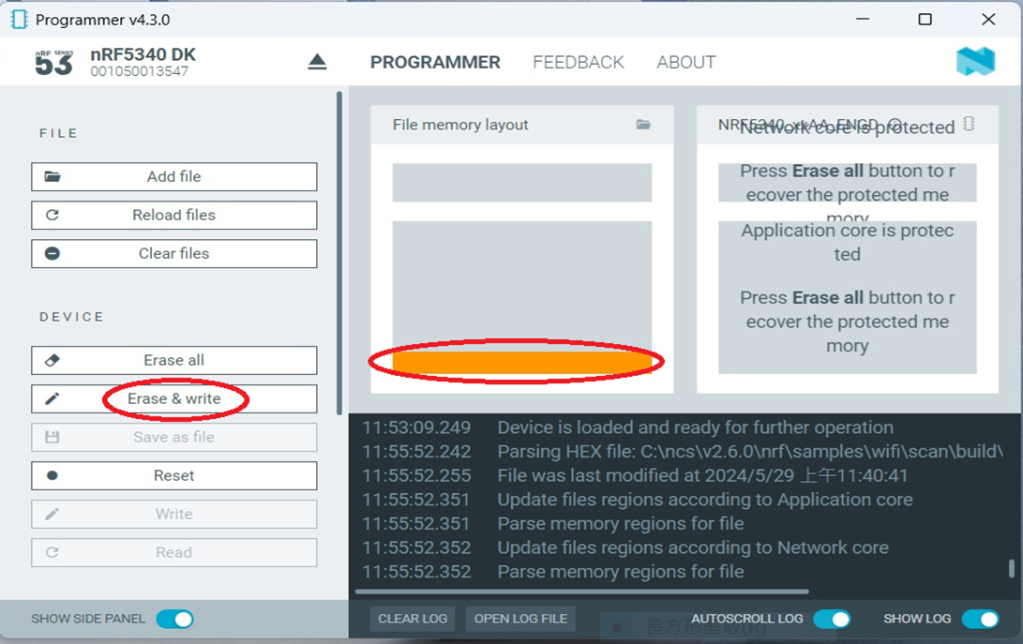
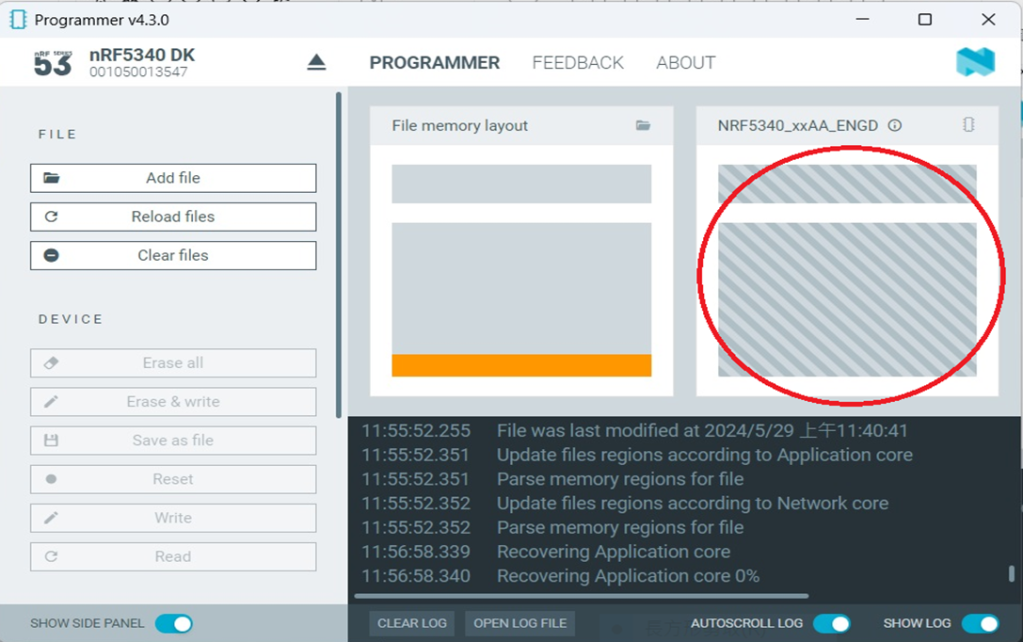
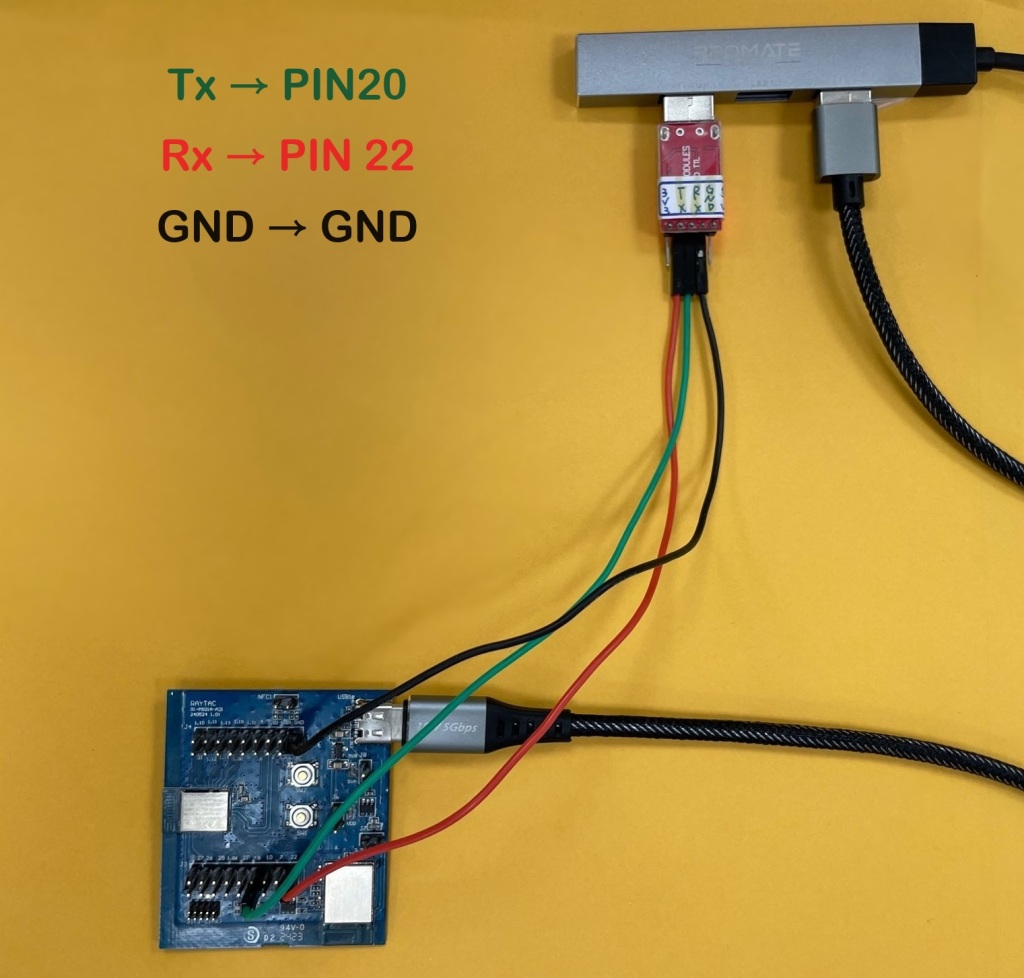
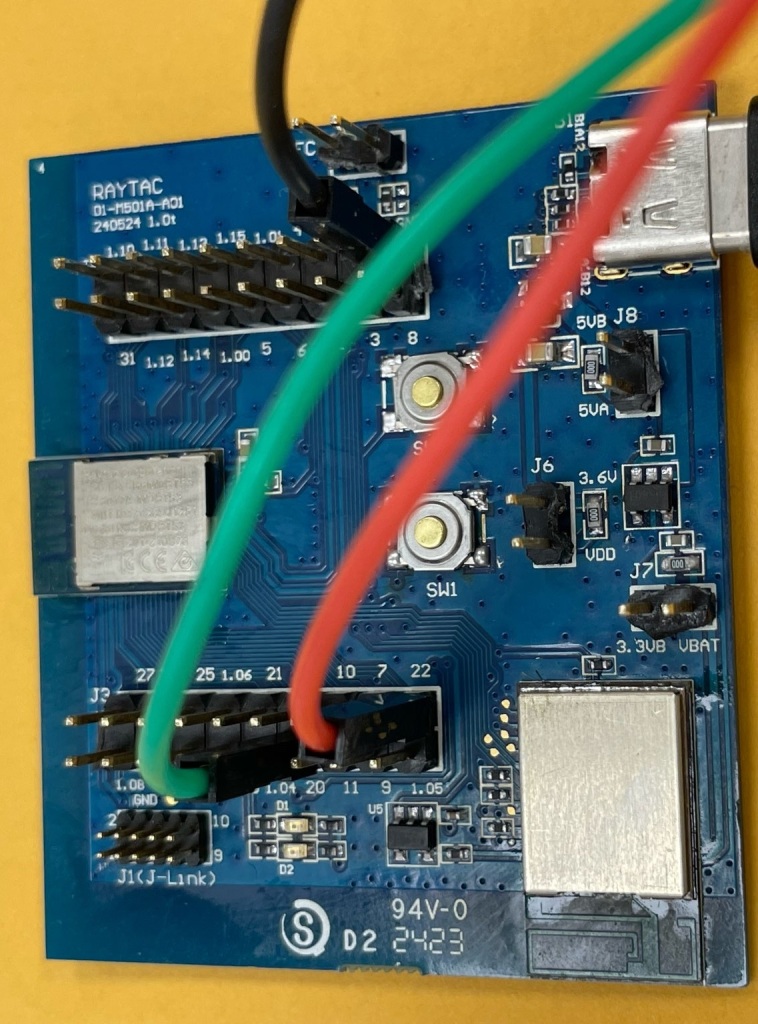
1. Program the original Wi-Fi radio test code (..\nrf\samples\wifi\radio_test) into the MDBT53 section,
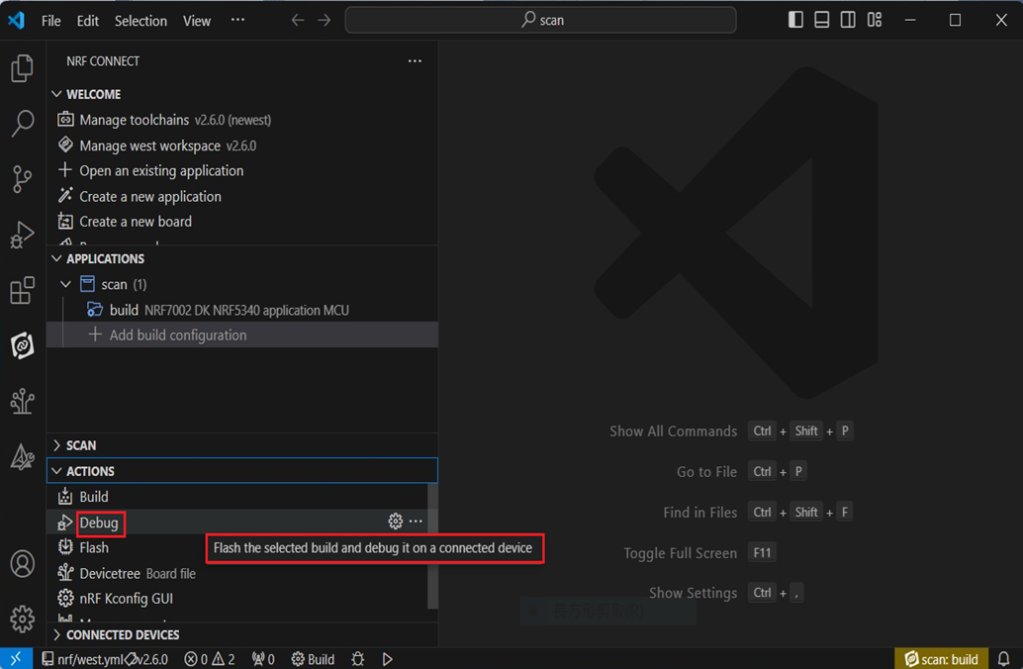
2. Then write the Wi-Fi MAC address in to the AN7002Q section(nRF7002 IC) via command.
After this, program the original Wi-Fi Scan code/Station code /Shell code … into the 5340, and it will function properly.
**Raytac will assign 2 Wi-Fi MAC addresses(for both 2.4GHz & 5GHz) to every AN7002Q module.
*If customers don’t have Wi-Fi MAC addresses for DevKit development yet, please reach out to service@raytac.com
==================================================================================
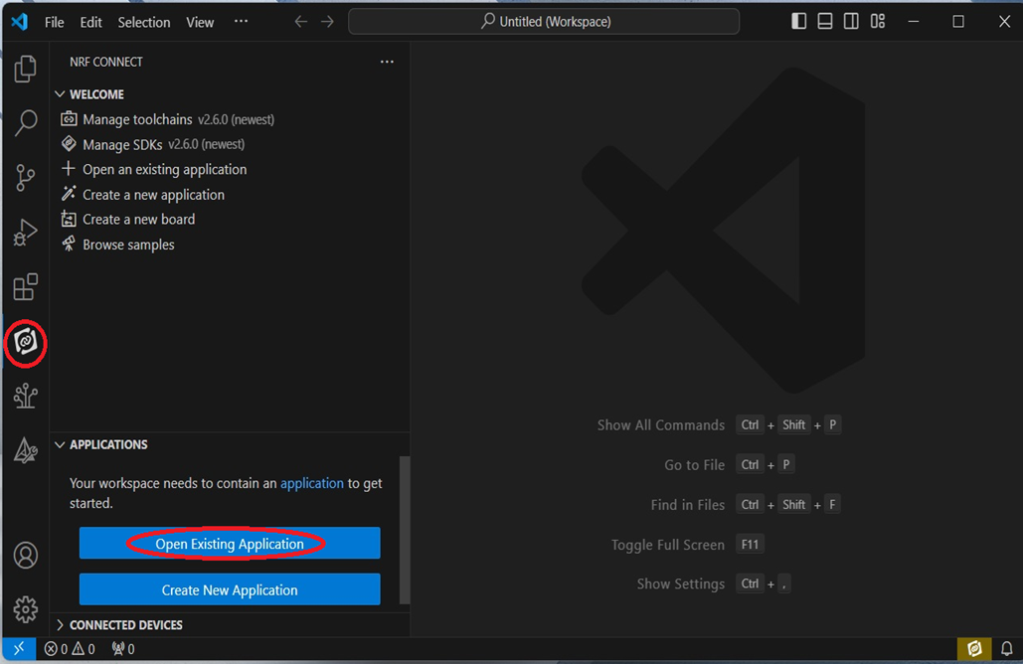
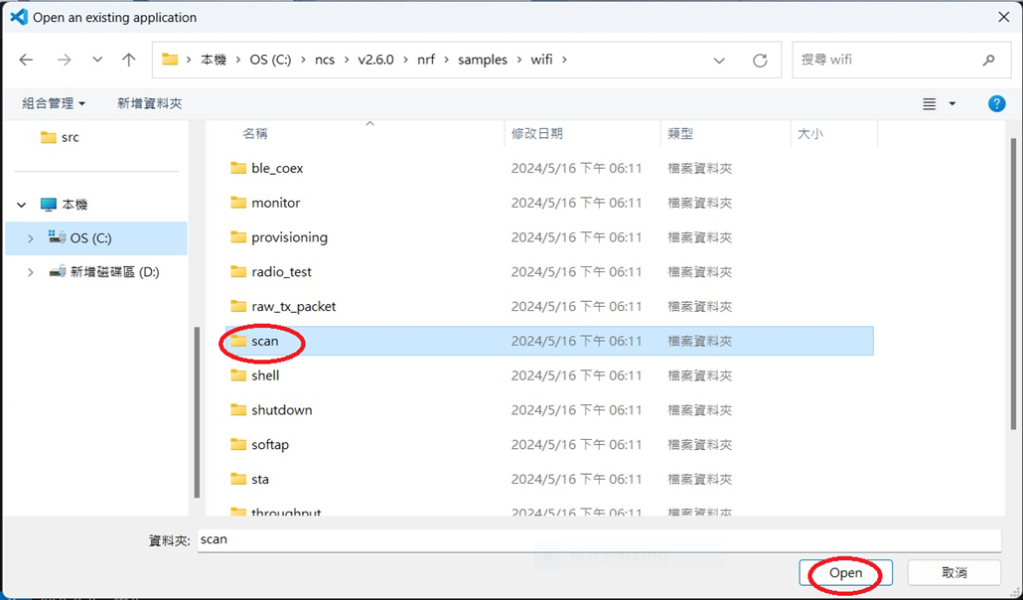
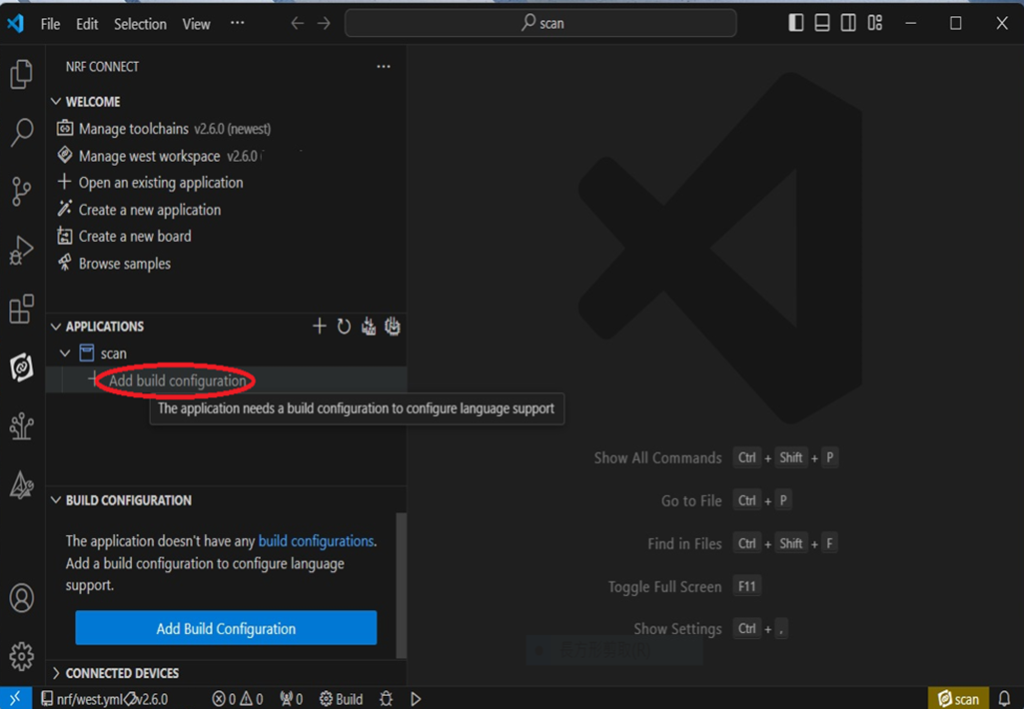
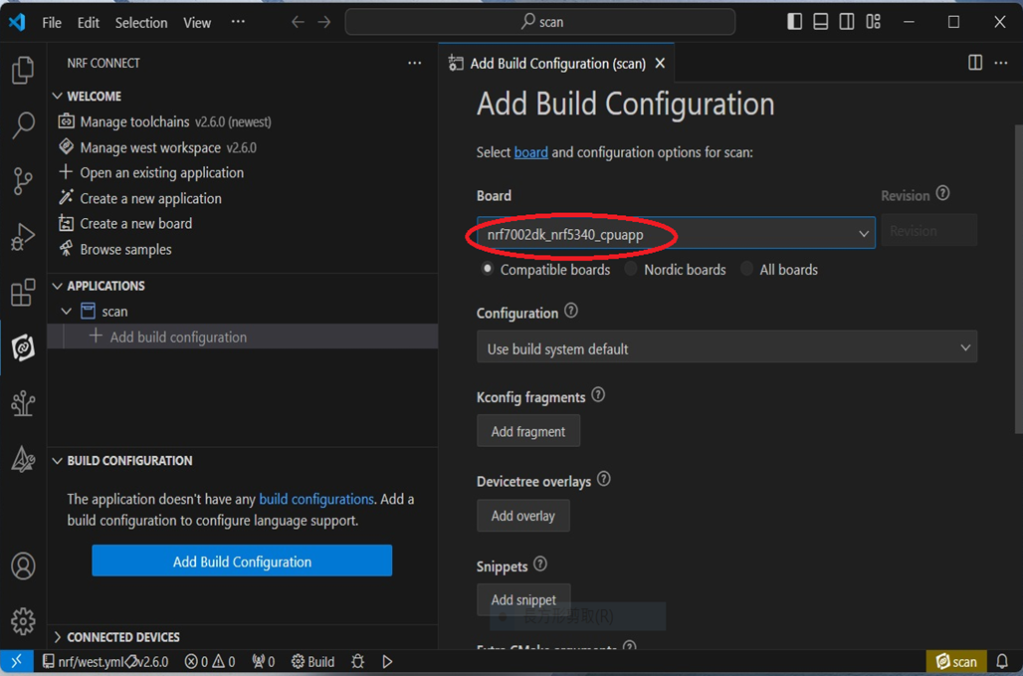
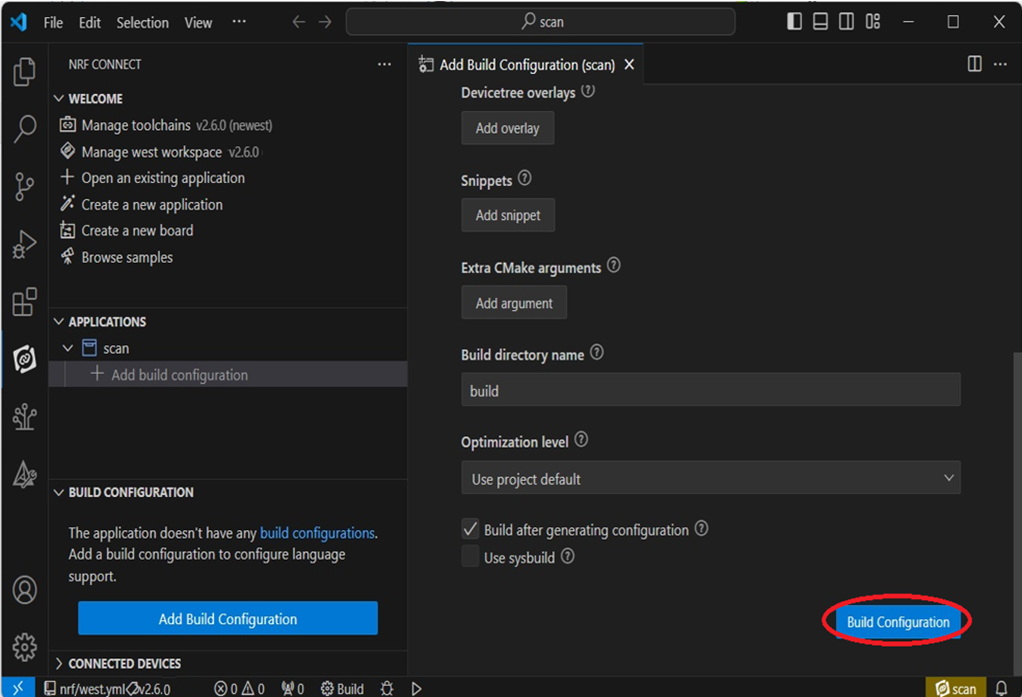
Case study 1. SCAN code example
Scenario:
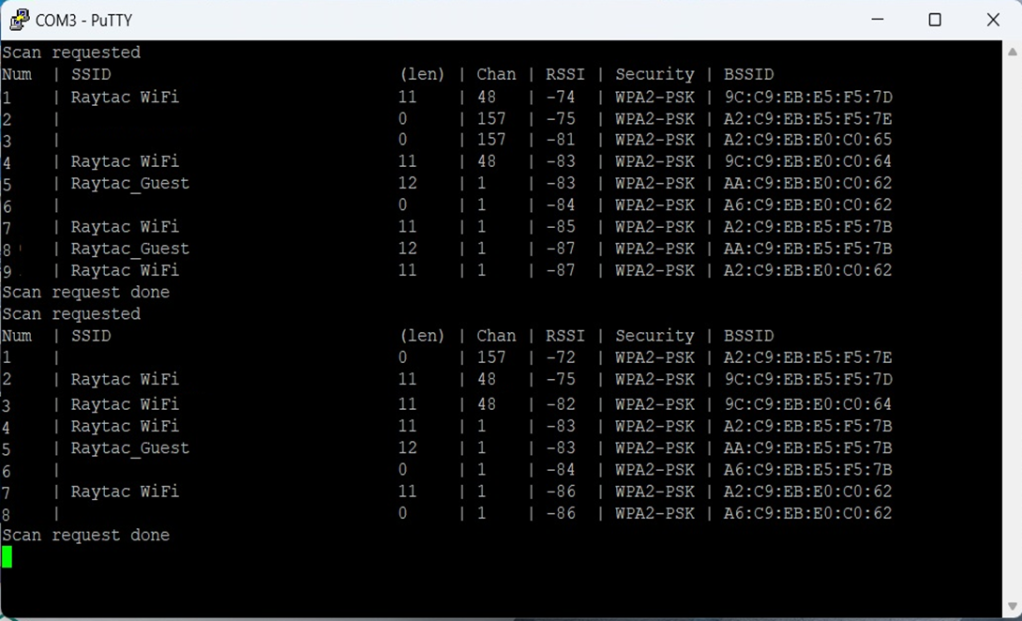
Following error occurred when building the SCAN example code, flash it onto the AN7002Q-DB-5340 board, and run the test.
Solution:
When running Wi-Fi scan code on NCS v.2.6.0 or later version, the OTP memory in the AN7002Q module must have a Wi-Fi MAC address programmed in for the Wi-Fi scan functionality to work properly.

(Note: OTP is a One-Time programmable memory, which means the value can only be written once.
The customer must aware of this before performing the OTP operation.)
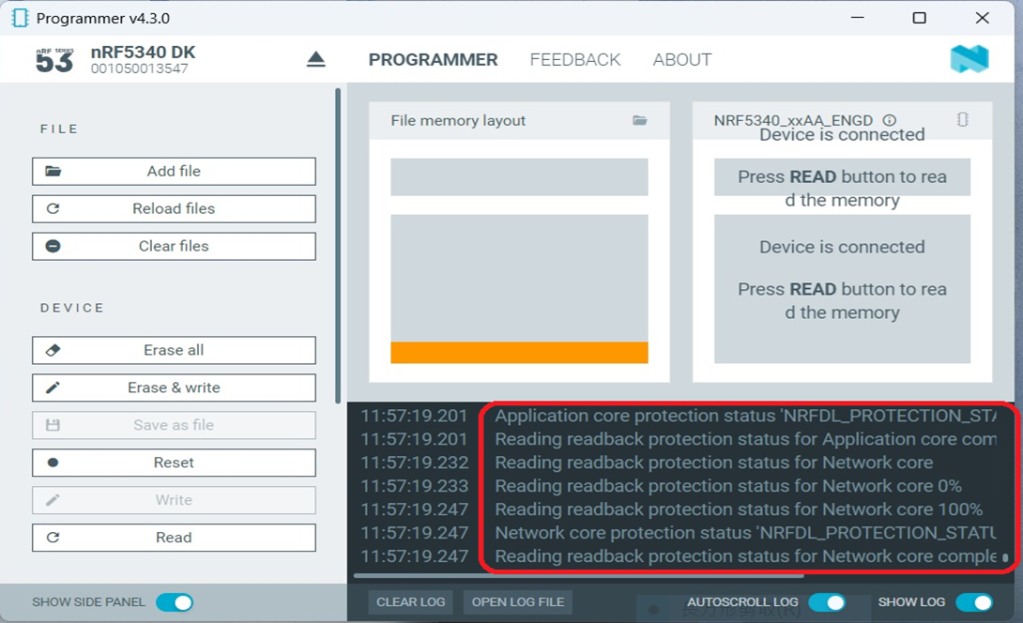
1. Program the original Wi-Fi radio test code (..\nrf\samples\wifi\radio_test) into the MDBT53 section,
then manually input and execute the following OTP read command.wifi_radio_ficr_prog otp_read_params


If you see both MAC0 and MAC1 display a value of 0xFF, as shown in above, it means that you haven’t written the Wi-Fi MAC address into the AN7002Q’s OTP.
2. Manually issue the OTP write command to write the Wi-Fi MAC address into the OTP.
https://docs.nordicsemi.com/bundle/ncs-latest/page/nrf/samples/wifi/radio_test/ficr.html

wifi_radio_ficr_prog otp_write_params 0x120 0xDDCCBBAA 0xFFEE
wifi_radio_ficr_prog otp_write_params 0x128 0xDDCCBBAA 0xFFEE
After you complete the above, use the OTP read command in below to check if the Wi-Fi MAC address value was written.
The MAC0 and MAC1 should display the value you’ve input from the OTP write command.wifi_radio_ficr_prog otp_read_params

3. Program the original Wi-Fi SCAN code back into the MDBT53, the Wi-Fi scan functionality should work properly.
==================================================================================
Case study 2. Shell code example
SDK Wi-Fi example test – Running Shell Code on AN7002Q-DB-5340:
Scenario:
An error occurs while running Shell code on AN7002Q-DB-5340.
Solution:
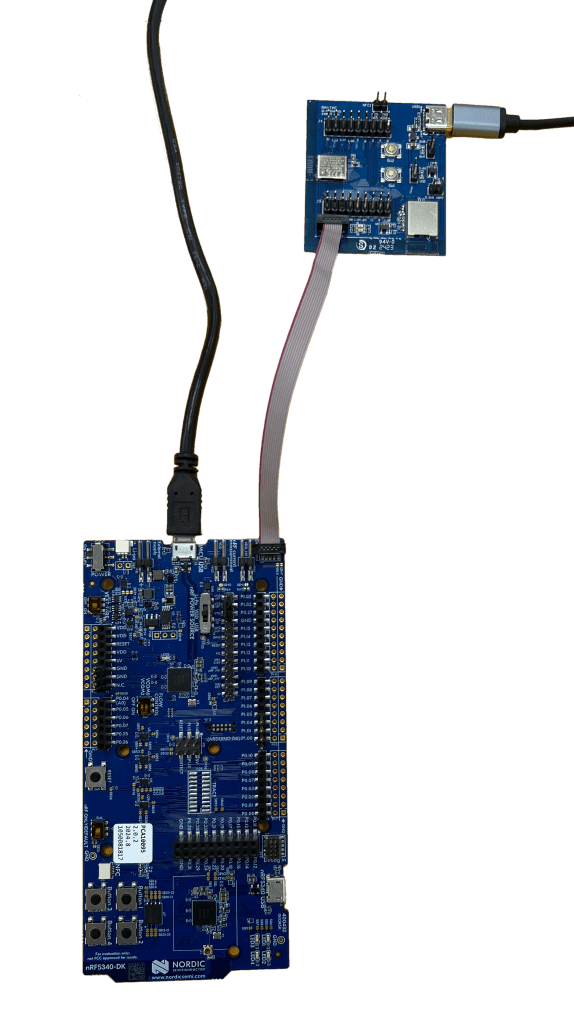
The AN7002Q-DB-5340 is paired with nRF5340 DK for development,
but neither of the 2 boards has an external MX25R64 (Serial NOR Flash) component.
So far, only the nRF7002DK board is equipped with the MX25R64.
Therefore, while running the original Wi-Fi shell code, the program will enable SPI NOR.
When using AN7002Q-DB-5340, you should add CONFIG_SPI_NOR=n in the prj.conf file to disable SPI NOR, to turn off any configurations related to it.
After recompiling and flashing, the shell code function
( e.g., Wi-Fi scan/Wi-Fi connect/net ping ..) should work properly.
Edited by Sales Manager: Ms. Mandy Chao
Technical guidance provided by R&D Manager: Mr. MW Lee
Keyword: nRF7002 MAC address
Raytac Corporation 勁達國際電子股份有限公司
Bluetooth & WiFi module maker based on Nordic nRF54, nRF53, nRF52, nRF7002 solution
BT5.4 &BT5.3 & BT5.2 & BT5.1 Qualified, FCC/IC/CE/Telec/KC/RCM/SRRC/NCC Pre-Certified.
Bluetooth Solution: nRF54, nRF5340, nRF52840, nRF52833, nRF52832, nRF52820, nRF52811, nRF52810, nRF52805, nRF51822
WiFi Solution: nRF7002
http://www.raytac.com
email: sales@raytac.com
Tel: +886-2-3234-0208