Edited by Jocelyn Tsai / Account Manager
Here provides the easy introduction to the article of Hardware & Firmware Set up with step-by-step guidelines for nRF5340 Module demo board MDBT53-DB-40/MDBT53V-DB-40.
- Hardware Set Up
- Software Kits Resource & Preparation
- To recognize your nRFConnect SDK version case by case
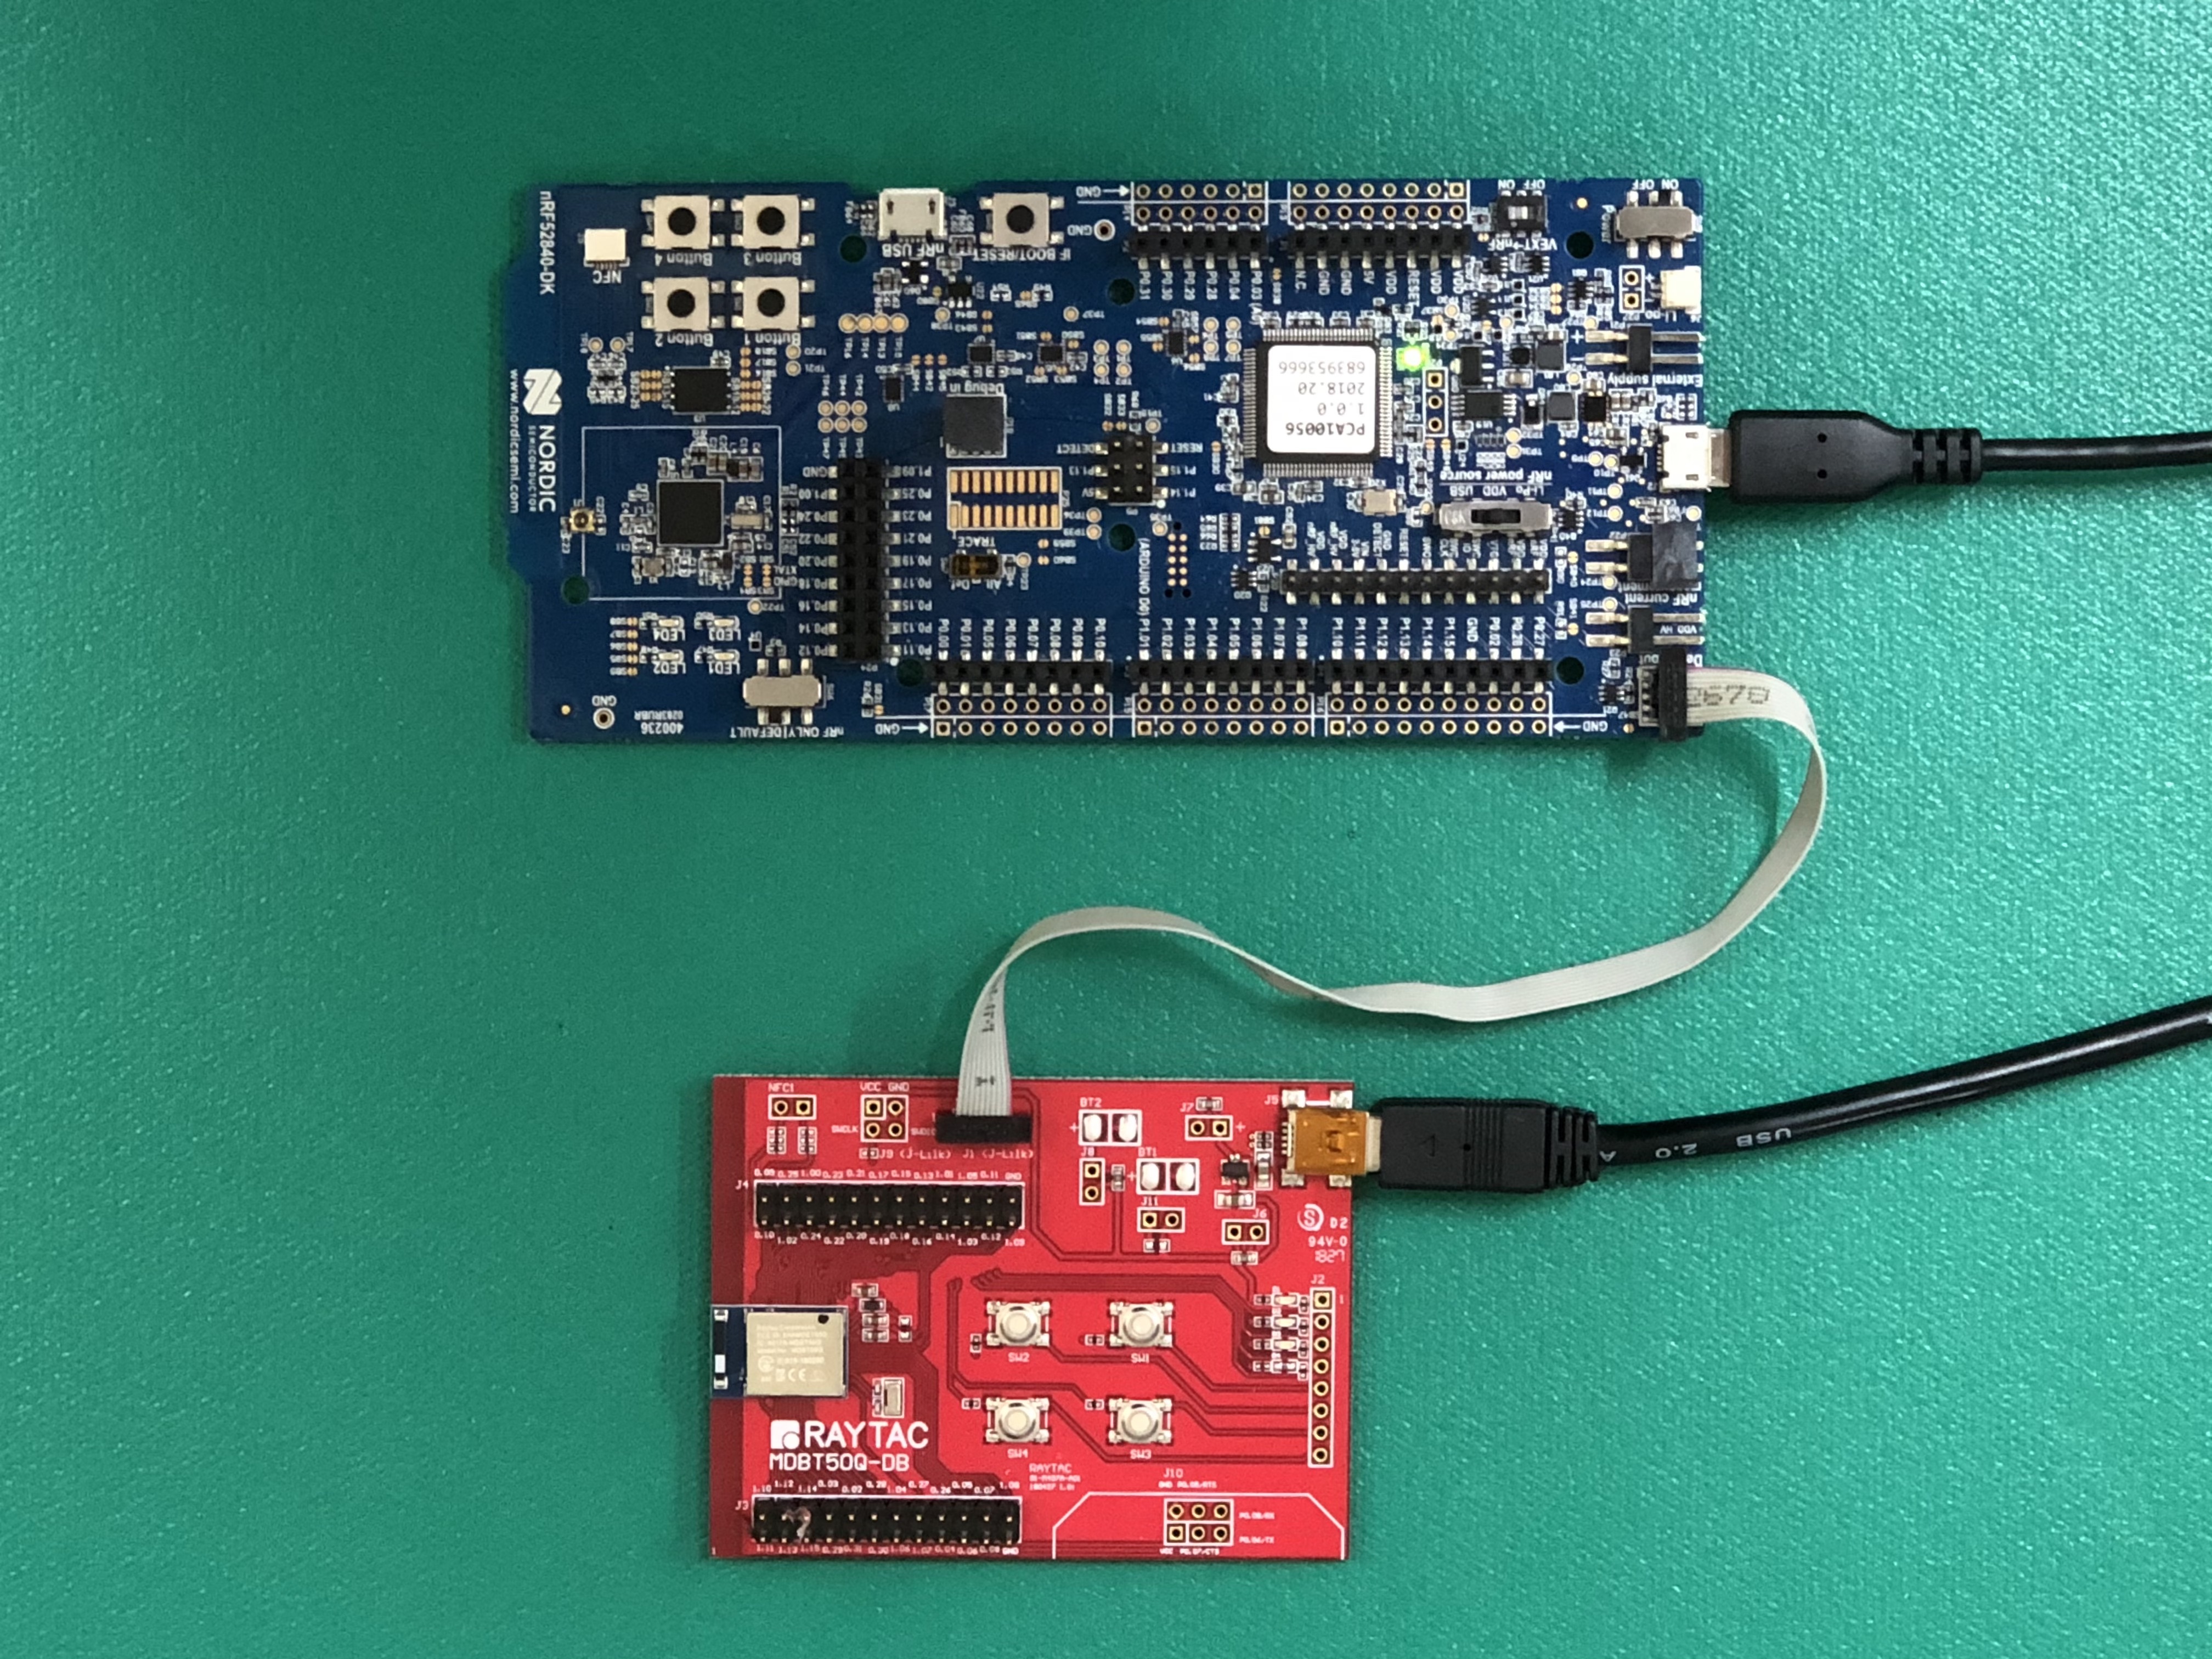
1. Hardware Set Up
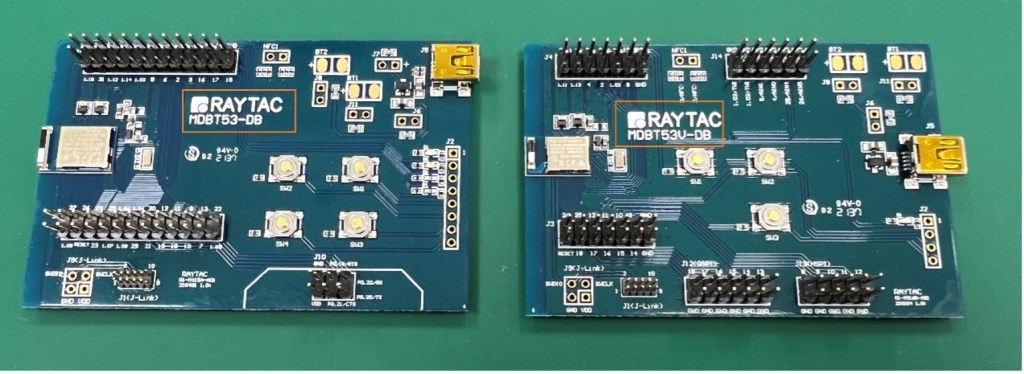
- 1 x Nordic nRF5340-DK Board: PCA10095(2.0.0)
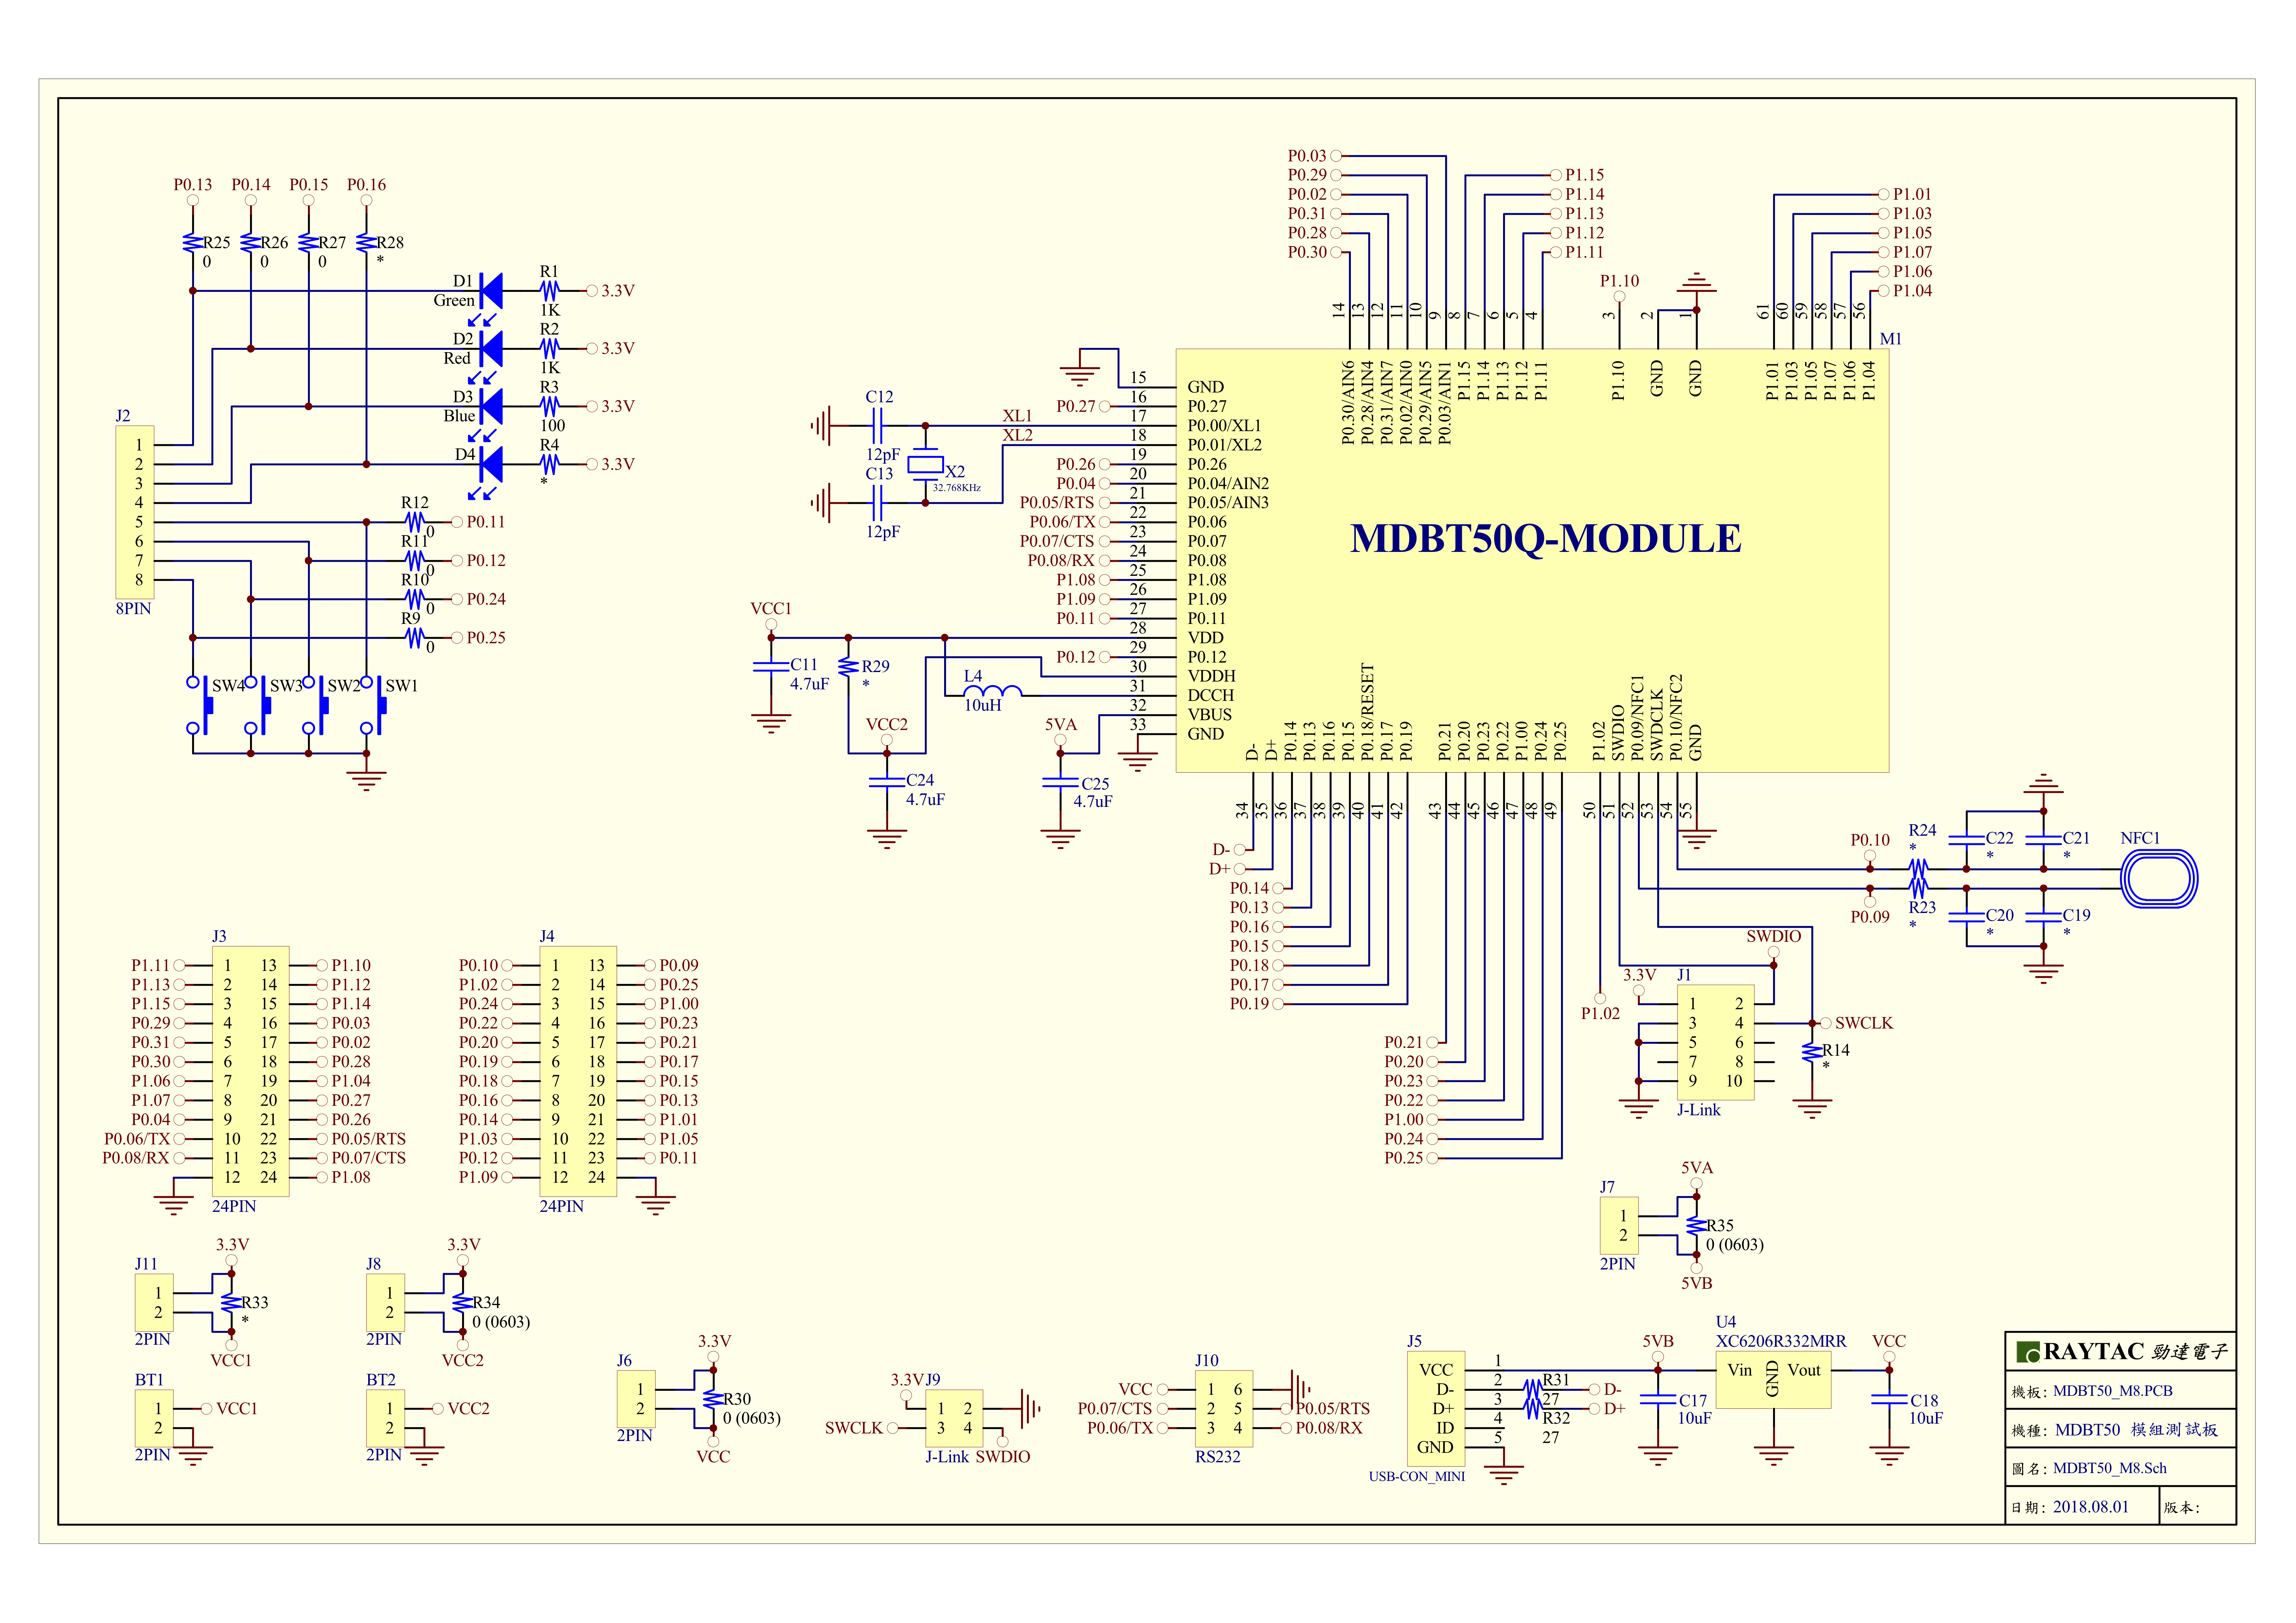
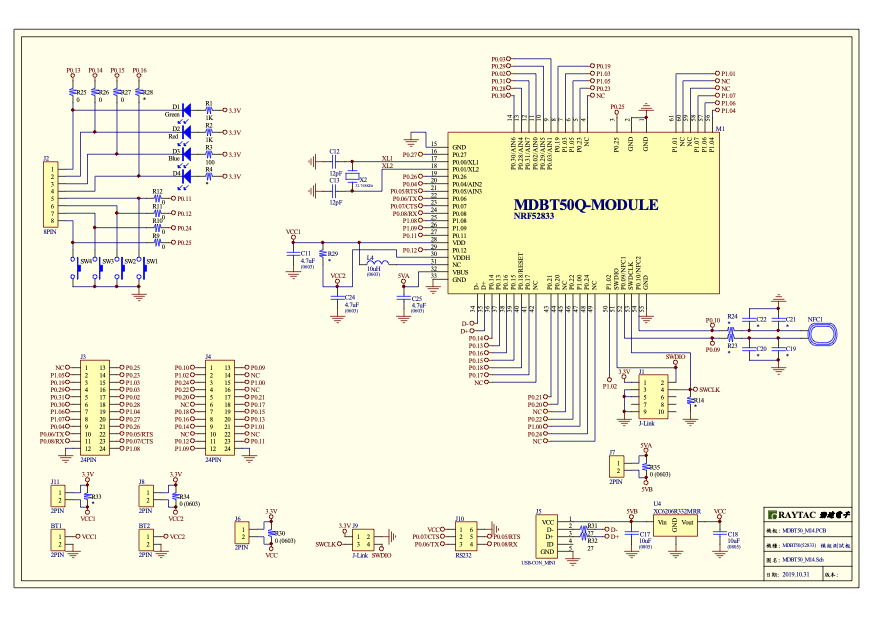
- 1 x MDBT53-DB-40 or 1x MDBT53V-DB-40
- 1 x IDC Wire
- 1 x Power Micro USB
- 1 x Power Mini USB
**Reminder: Both “Nordic nRF5340-DK” and “Raytac MDBT53/53V Demo BD” should be included into the working network for program development.
Where to buy MDBT53-DB-40 , MDBT53V-DB-40
MDBT53-DB-40 (nRF5340 Solution)
MDBT53V-DB-40 (nRF5340 Solution)
- Using Nordic DK as J-Link ( nRF5340 DK ONLY) Connects with MDBT53/53V DB by IDC wire.
- Powered up MDBT53/53V DB by Mini USB wire.
- Powered up the nRF5340-DK by Micro USB wire.


2.Software Kits Resource & Preparation
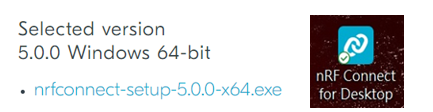
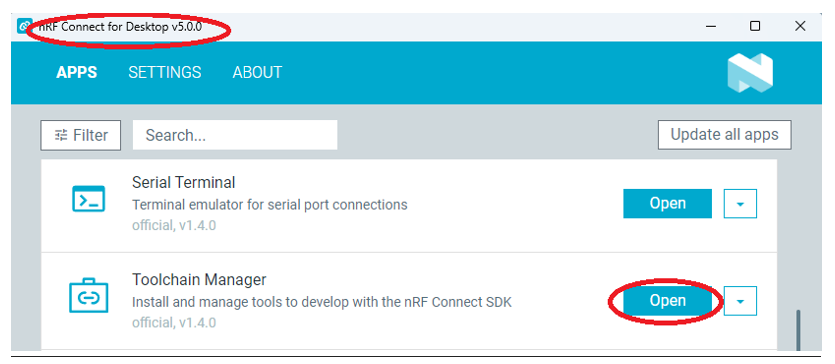
Download nRF Connect For Desktop (Please Click Me)
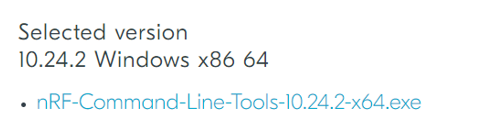
Download nRF Command Line Tools (Please Click Me)
Preparation
a. Prepared with the latest version of nRF Connect for Desktop
Selected version 3.12.0 Windows 32-bit and 64-bit
nrfconnect-setup-3.12.0-ia32.exe
b. Prepared with the latest version of nRF Command Line Tools
Selected version 10.18.1 Windows X86 64
nrf-Command-Line-Tools-10.18.1-x64.exe
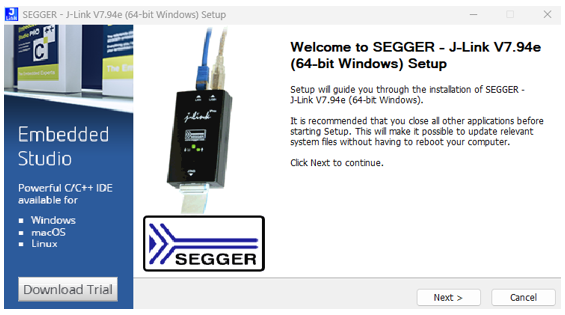
**Note: SEGGER J-LINK Upgrade message might pop up while you’re doing above download.
If you’re initiating Segger Embedded Studio (SES) application, please check the guideline here
c. Locate all the necessary kits for programming in PC (Check Software/Application list)

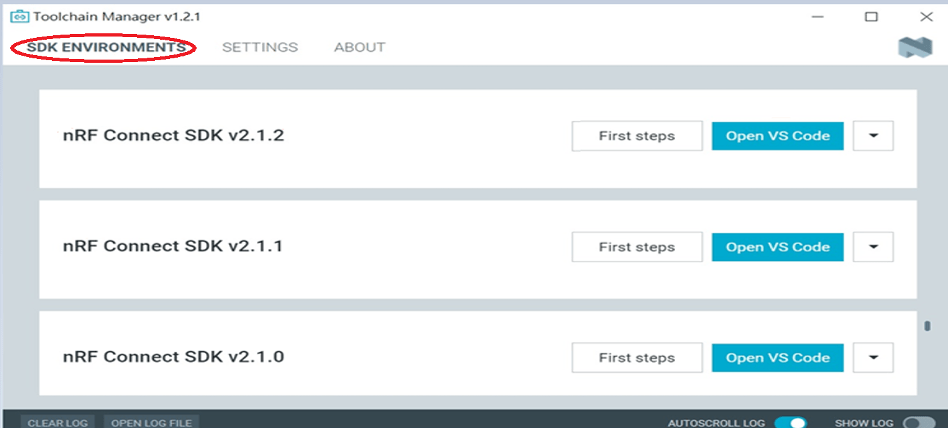
3. To recognize your nRFConnect SDK version case by case
Intro: The preparation of nRF Connect SDK Vx.x.x(NCS SDK version, ) and Nordic Example code will help you get through the program code building and trace debug in VS Code IDE or Segger Embedded Studio IDE. Here’s the brief way to recognize your nRFConnect SDK version which suits your project development.
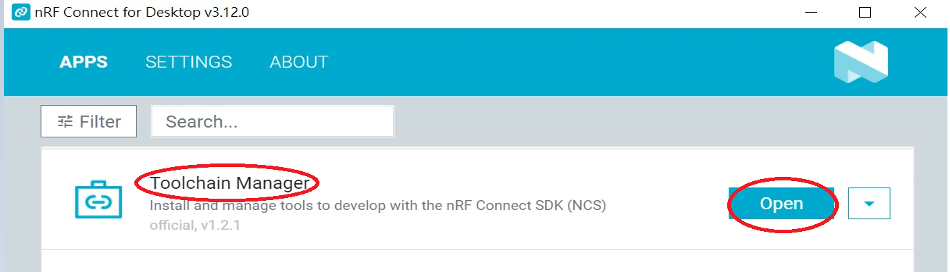
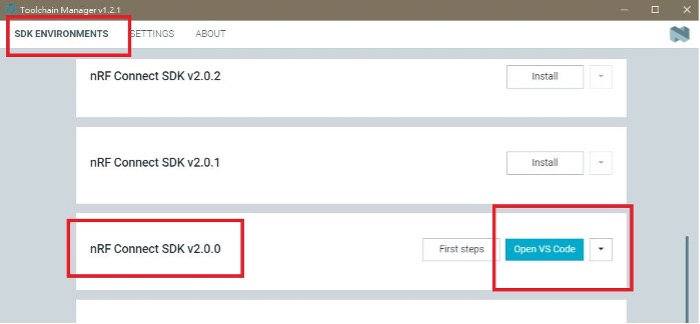
Step1.
Activated your “nRF Connect for Desktop” >> “Toolchain Manager” >> “Open” >> “Install”
(**Note: The development nRF Connect SDK(NCS) provides with free VS Code IDE and Segger Embedded Studio IDE as compiling system)
Step2.
To recognize your project is with or without Audio inquiry and download the “nRF Connect SDK(NCS)” by the following classification.
A.) Project with Non-Audio case
Option1. Go with NCS V1.9.1 (Included) and previous version.
There’re either “Open VS Code” or “Open Segger Embedded Studio” IDE options could be selected for program coding.
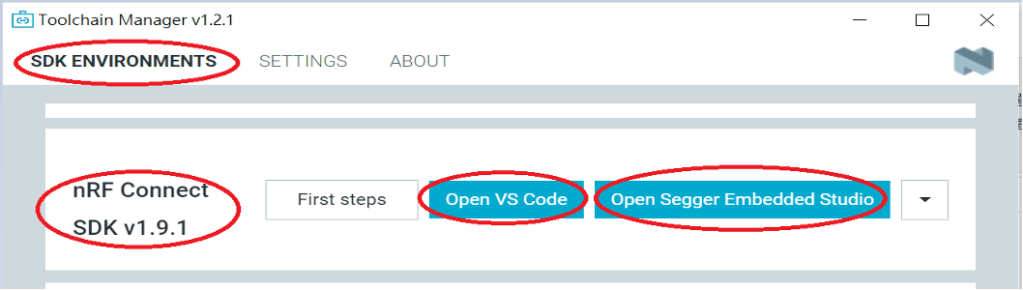
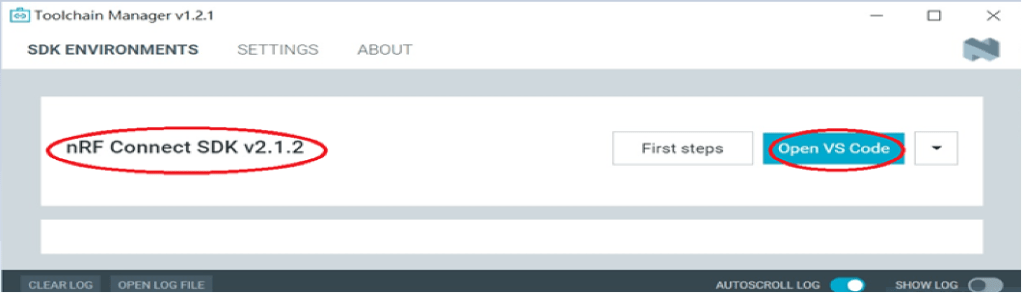
Option2. Go with NCS V2.0.0(included) and the later.
There’s simply “Open VS Code” IDE that could be run for program coding.
B.) Project with “Audio” inquiry
You would only have option of NCS V2.0.0(included) and the later version working in “Open VS Code” IDE.
Step3.
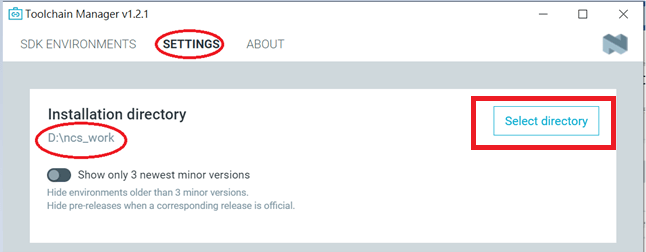
Please make sure the nRFConnect SDK is installed at same base directory with compiling system (the root of Open VS Code)
(This is using D:\ncs-work base as example.)
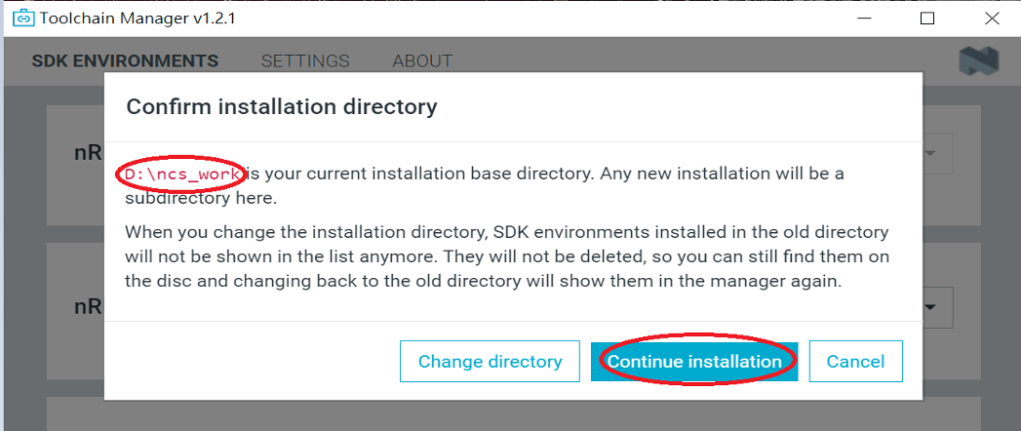
If the base is not directing to the same, do “Select directory’” to re-direct the route.
Step4.
nRFConnect SDK Vx.x.x Download ready
Find more information about nRF5340 Module firmware development resources in below link!
“How To USE Nordic Connect SDK (NCS) Flashing Built Code into nRF5340 Module" , Please click this link!
“How To Get Started With nRF5340 Module Program Coding and Compiling" Please click this link
Raytac Corporation 勁達國際電子有限公司
A BT5.2 & BT5.1 & BT5 module maker based on Nordic nRF53 & nRF52 solution
(nRF5340 & nRF52840 & nRF52833 & nRF52832 & nRF52820 & nRF52811 & nRF52810 & nRF52805)
www.raytac.com email: service@raytac.com Tel: +886.2.3234.0208


_1000X1000_190102")